Journey to Midwest Conquest - 3
- Darin

- Mar 12, 2020
- 3 min read
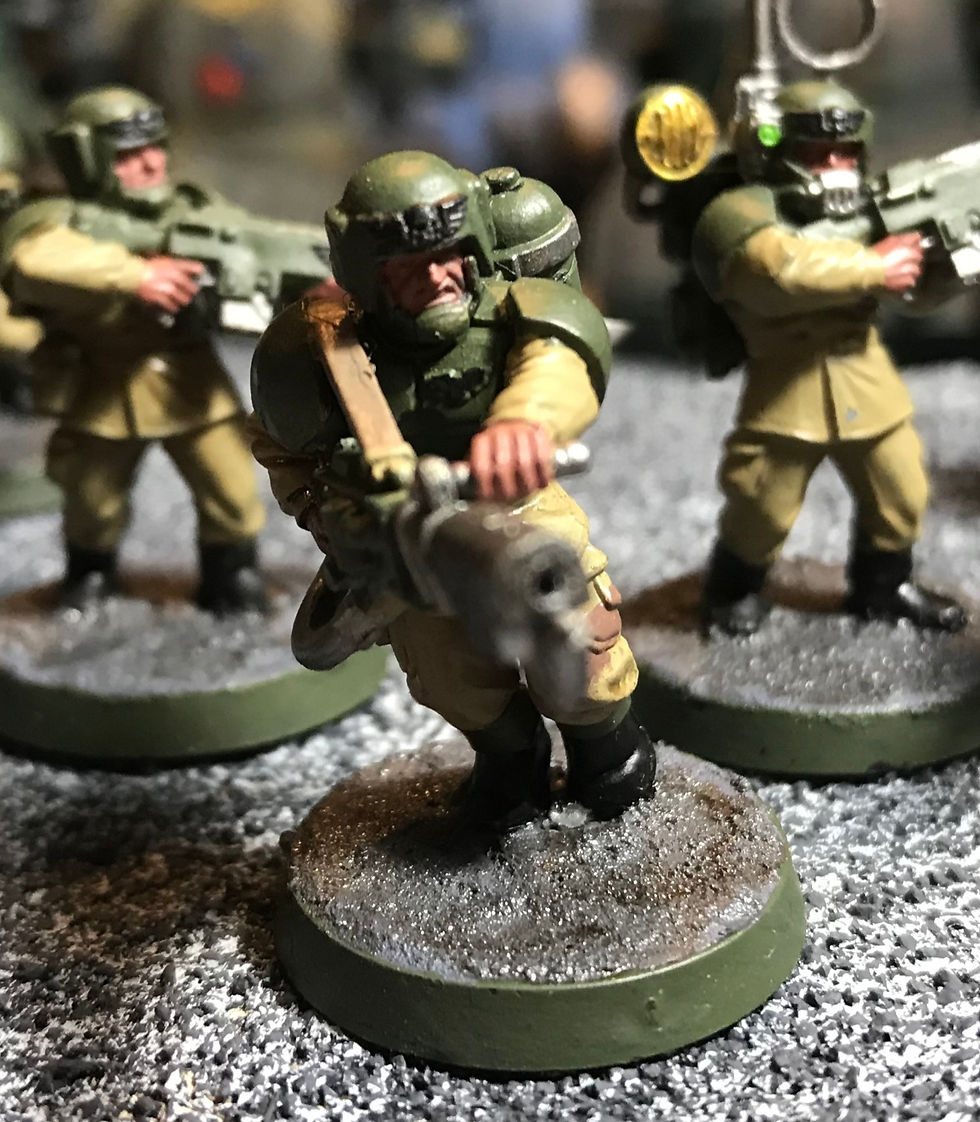
Last week I went over the basics of assembling some infantry, so now it's time to paint them! For my army I'm going with a standard color scheme for the infantry, khaki fatigues with army green armor. I'm using Games Workshop paints, so these colors equate to Zhandri dust for the khaki and Castellen Green for the army green. Additionally I'm using black (Abbadon Black = GW paint name), white (white scar), a brown (mournfang brown) and a metallic silver (leadbealcher) for additional details. For the faces and hands I'm using a flesh tone (Kieslev flesh), for these guys, though I've used a darker skin tone for previous models (bugmans glow).
Some pictures of the paints:


So for the actual painting process, my method is to base coat the miniatures with the khaki color, which I usually do with some spray paint since it's a lot faster when painting in bulk like I am, and then go over all the armor with the green, which usually needs two to four coats.

Next I hit the boots with two or three coats of black, and then move on to the metal bits (gun barrels, bayonets, canteens, grenades, swords, etc.), usually one coat does it on the metallic paint, but sometimes a second one is required.

Next up are the finer details, markings on the helmets, sergeants rank insignia, and markings on the guns/swords. I usually use black for these, but some of my sergeants insignia I've done with white, just to mix it up a bit.

I then like to do some touch up with the khaki and the green, just fixing any mistakes/bleed over from the other colors on the fatigues and armor (usually have to do some touch up on the helmets and guns since the details there are really small), before moving onto the last of the detail work, hitting any parts with the brown.
Now not all of the miniatures have stuff on them that I paint brown, so this is usually a really short step. Lastly, it's time to do the faces and hands! Some people will go as far as painting white and black for the eyes (example here from my friend Mumbles who painted this guy for me), but I don't worry about that on all my basic infantry. I'm going to have over a hundred of these guys on the table top, so I'm not worried about them having bland faces. That concludes the painting, but we still have a couple more steps to go!
So the next (and final) steps are basing (adding detail and paint if needed to the bases of the model), and applying a wash (I'm using Games Workshop washes, specifically Agarax Eathshade, though you can use any, including homemade washes). For the basing on my regular infantry I'm using some Games Workshop "Technical" paint. It's a textured paint that once you apply it to a base and it dries, it comes out looking like some ground. Here are some examples of the finished product from my army that have been done for a while:


Some of the miniatures in my army have larger bases, and for those I'm using another method for basing. It's pretty simple. First you apply a generous coat of glue (PVA/White glue works great), and then you apply some sand. You can get actual modeling sand, which I do have, but for these I'm actually just using quick crete sand I bought at the hardware store (about $5 for a ____ bag that will last a very long time). I also added some larger "rocks" just to help give some more character and uniqueness to the base.


So that's it for this weeks blog! Next week I'll be covering the actual game side of my infantry, what they are used for, good at, bad at, etc. I am planning on keeping things fairly generic and "big picture" rather then diving into specific rules and mechanics, so hopefully it will be and interesting read for people beyond those that are familiar with Warhammer 40k.
Thanks for reading, and check back next week!


Comments